3D rendering is a powerful tool for bringing ideas to life, but even experienced designers can make errors that compromise the final result. Whether you’re creating architectural visualizations, product designs, or animations, avoiding common pitfalls is essential to achieving professional-quality renders.
In this post, we’ll explore the most common 3D rendering mistakes and provide actionable 3D rendering tips and tricks to help you avoid them.
Why does my rendering look unrealistic?
Unrealistic renderings are often caused by:
- Poor-quality textures.
- Inadequate or incorrect lighting.
- Unrealistic material settings, such as overly shiny surfaces.
- Lack of context or environmental details.
Use high-resolution assets, balance lighting, and add realistic imperfections to materials for better results.
Learn more: 10 Expert Tips to Create Realistic Renderings for Designers
Common Mistakes in 3D Rendering and How to Avoid Them
Learn how to avoid the 10 most common 3D rendering mistakes. Master lighting, textures, and composition for professional-quality visuals.
Common mistakes in 3D rendering
1. Poorly Optimized 3D Models
Mistake: Using overly complex models with unnecessary geometry or unclean meshes can lead to slower rendering times and bloated file sizes.
How to Avoid:
- Simplify your models by removing unnecessary details.
- Use tools like CleanUp³ in SketchUp or built-in optimization tools in Blender.
- Replace detailed background objects with lower-polygon versions or 2D cutouts where possible.
Tip: Use proxies for complex objects like trees or furniture to improve scene performance without sacrificing detail.
2. Ignoring Texture Quality
Mistake: Using low-resolution or poorly scaled textures makes surfaces look unrealistic and blurry.
How to Avoid:
- Choose high-resolution textures from reputable sources like Poliigon or Poly Haven.
- Ensure proper UV mapping to align textures accurately.
- Add details such as bump maps, normal maps, or displacement maps to enhance realism.

Tip: Always check texture scaling to ensure materials appear at the correct size in your scene.
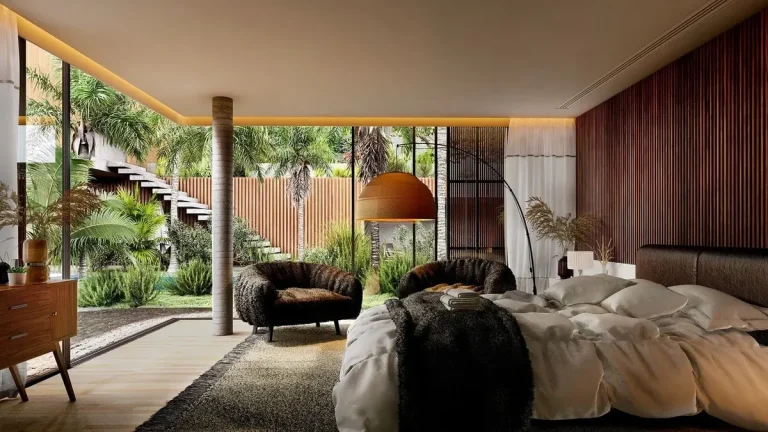
3. Overlooking Lighting
Mistake: Poor lighting choices, such as overexposed or underlit scenes, can ruin an otherwise great render.
How to Avoid:
- Use a combination of natural and artificial lighting for balanced illumination.
- Experiment with HDRI maps to create realistic ambient lighting.
- Adjust light intensity, shadows, and color temperature to match the scene’s mood.
Tip: Avoid placing light sources directly in front of or behind the camera to prevent unnatural effects.
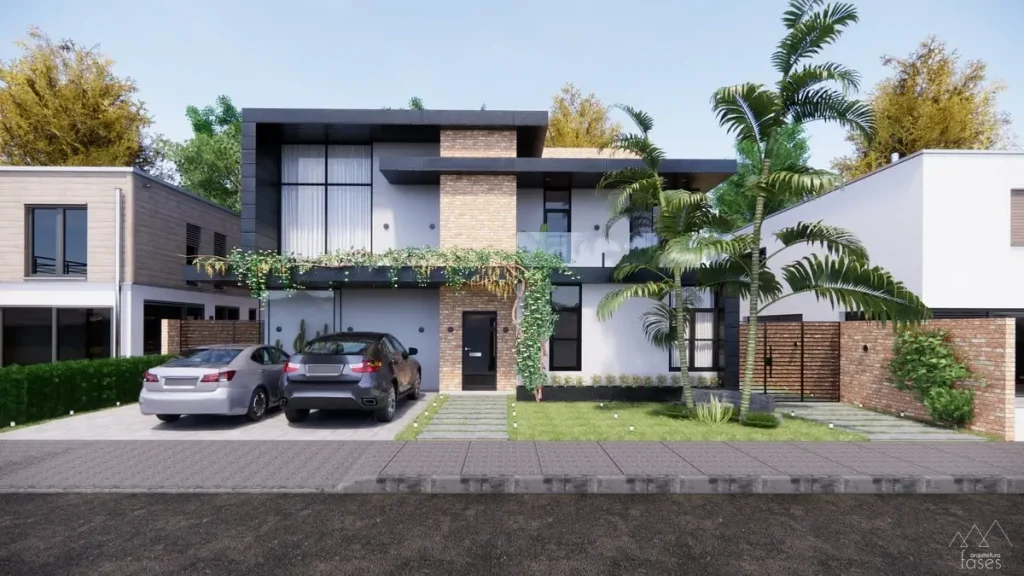
4. Forgetting Scale and Proportions
Mistake: Incorrectly scaled objects or inconsistent proportions make scenes look unnatural and can confuse the viewer.
How to Avoid:
- Use reference measurements to ensure all objects are to scale.
- Add familiar elements like furniture or people to provide context and relatability.
Tip: Most 3D modeling software includes measurement tools—use them to double-check dimensions.
5. Overloading Scenes with Details
Mistake: Adding too many high-poly objects or textures can overwhelm the scene and negatively affect rendering performance.
How to Avoid:
- Focus on the primary elements of the scene, and use lower-detail objects for the background.
- Render in layers or passes to isolate important details without overloading the system.
Tip: A well-composed scene with fewer details often looks more professional than a cluttered one.
6. Unrealistic Reflections and Materials
Mistake: Overly shiny or reflective materials can make objects look fake, while matte surfaces without any reflectivity appear flat.
How to Avoid:
- Adjust material properties like roughness and specularity to mimic real-world surfaces.
- Use fresnel reflections for more realistic angles of reflection.
Tip: Observe real-world materials to understand how light interacts with different surfaces.
7. Neglecting Camera Settings
Mistake: Poor camera placement and settings can distort perspectives or fail to highlight key aspects of the design.
How to Avoid:
- Use the rule of thirds and leading lines to compose your shots.
- Adjust the field of view (FOV) and use depth of field (DOF) to focus on important areas.
Tip: Treat your 3D camera as you would a real-world camera. Experiment with angles, focal lengths, and lighting.
8. Overdoing Post-Processing
Mistake: Excessive post-processing, such as over-saturated colors or unrealistic bloom effects, can make renders look unnatural.
How to Avoid:
- Aim for subtle enhancements during post-processing to maintain realism.
- Use tools like Photoshop or Affinity Photo sparingly and strategically.
Tip: Compare your final render to real-world photographs to ensure your adjustments are realistic.
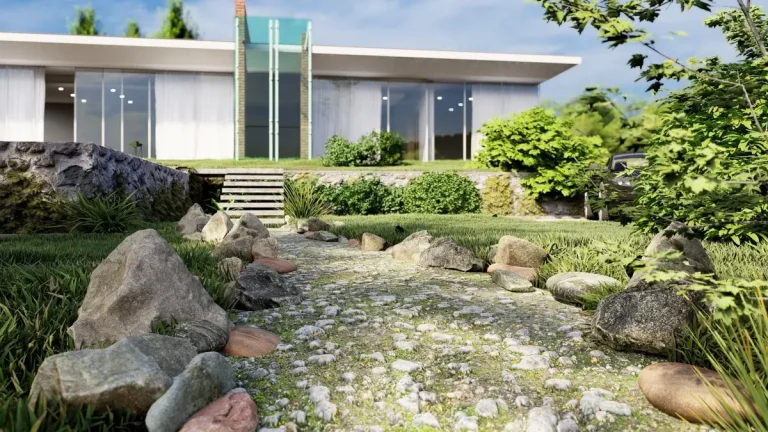
9. Forgetting Context and Environment
Mistake: A render that lacks a proper environment or context can appear incomplete and detached.
How to Avoid:
- Add realistic backgrounds, landscapes, or HDRI environments to ground your render.
- Include props, such as furniture, people, or vegetation, to make the scene feel lived-in.
Tip: Ensure all elements in the scene are cohesive in style and scale.
10. Skipping Test Renders
Mistake: Rendering the final scene without test renders can lead to overlooked errors or unnecessary rework.
How to Avoid:
- Run quick test renders at lower resolutions to identify issues with lighting, materials, or composition.
- Gradually increase settings for higher-quality renders.
Tip: Save your progress in iterations, so you can revert to earlier stages if needed.
How can I optimize my scene for faster rendering?
To speed up rendering:
- Use proxies for complex objects.
- Optimize meshes by removing unnecessary polygons.
- Simplify background elements.
- Adjust rendering settings like sampling and resolution based on your needs.
FAQs
Q: What are proxies, and how do they help in rendering?
Proxies are simplified versions of complex models that replace detailed geometry during scene setup. They reduce the load on your system while maintaining high detail during rendering.
Q: What tools can I use for post-processing?
Popular tools for post-processing include:
- Adobe Photoshop for color grading and touch-ups.
- Affinity Photo as a cost-effective alternative.
- Built-in tools in rendering engines like V-Ray or Lumion for basic adjustments.
Q: What are some free resources for 3D assets and textures?
Here are a few excellent options:
- Texture Haven for high-resolution textures.
- HDRI Haven for free HDRI maps.
- BlenderKit for free models and materials.
Q: How important is the composition of a rendering?
Composition is crucial for guiding the viewer’s eye and making the scene visually appealing. Use rules like the rule of thirds, leading lines, and focal points to enhance your renders.
Conclusion
Avoiding these common 3D rendering mistakes can significantly enhance the quality of your 3D renderings and make your work stand out. By optimizing your workflow, refining your techniques, and paying attention to detail, you’ll create visuals that are not only technically sound but also visually captivating.
What are your biggest challenges in 3D rendering? Share them in the comments below, and let’s discuss how to tackle them together!